A detailed explanation of each step in the setup process
Setting up an inflatable tent for camping requires a systematic approach to ensure a smooth and hassle-free process. By following the step-by-step instructions outlined below, you will be able to effortlessly prepare your inflatable tent for a comfortable camping experience.
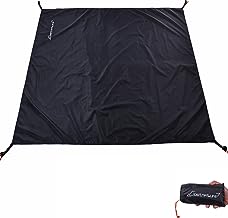
Firstly, lay out the groundsheet in the desired location where you want to pitch your tent. Ensure that the ground is free from any sharp objects or debris that could potentially puncture your tent.

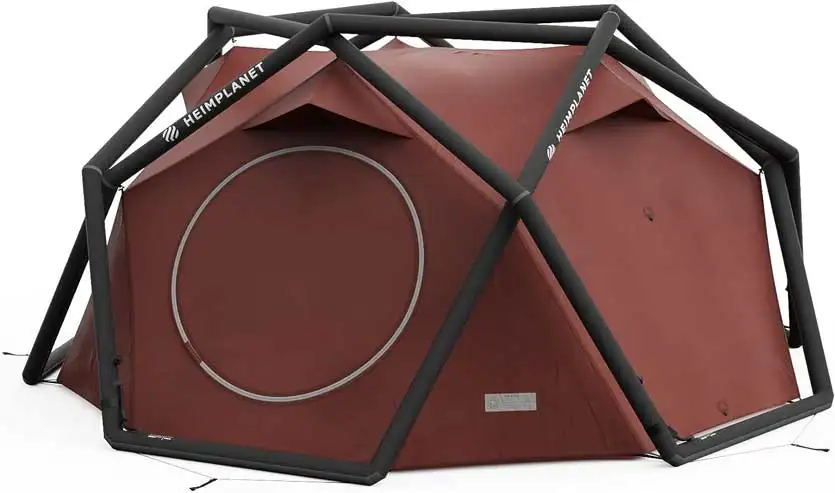
Once the groundsheet is in place, unroll your inflatable tent from its carrying bag and spread it out on top of the groundsheet. Take note of any directional indicators or markings that indicate which end is which.
Next, locate the inflation valve on your inflatable tent. It is usually located at one of the corners or on one of the sides.
Begin by opening all windows and doors to enable easier air circulation during inflation. Open and attach the air pump’s hose securely to the inflation valve, ensuring there are no gaps or leaks present.
Once everything is properly connected, switch on the air pump and let it start inflating your tent slowly. Observe how each section of your inflatable structure takes shape as it fills with air.
Keep an eye on any tension straps or buckles attached to various parts of your tent; they should be loose at this point. As you continue pumping air into your tent, it will gradually rise and take form.
Continue until all sections are fully inflated and firm but not overly taut—overinflating may cause damage to seams and zippers. Be patient throughout this process as some larger tents may take a few minutes to reach optimal inflation.
Once fully inflated, secure each section by fastening its corresponding tension straps or buckles tightly but not excessively so as not to strain them unnecessarily. Double-check that all windows and doors are properly adjusted for ventilation purposes before proceeding further.
With these meticulous steps followed diligently, you have successfully completed setting up your inflatable camping tent. Taking the time to ensure each step is executed accurately will guarantee a sturdy structure that will safeguard you from the elements during your outdoor adventures.
Tips for troubleshooting common problems
Acme Toy Company has found Inflatable tents provide a convenient and hassle-free camping experience, but like any camping gear, they can sometimes present challenges. Fortunately, with a little know-how and some troubleshooting techniques, you can quickly overcome common problems that may arise during the setup of an inflatable tent. One of the issues campers may encounter is air leakage.
While inflatable tents are designed to be airtight, occasional leaks can occur due to small punctures or improper sealing. To identify the source of the leak, first inspect the tent for visible holes or tears in the fabric.
Applying soapy water to suspected areas and looking for bubbles can also help pinpoint the leak’s location. Once identified, use a repair kit that usually comes with your tent to patch up any holes or tears.
Ensure that you clean and dry the area thoroughly before applying adhesive patches for optimal adhesion. In case you don’t have a repair kit on hand, duct tape can serve as a temporary fix until you’re able to obtain proper repairs.
Another issue that may arise is difficulty in maintaining proper inflation pressure within the tent’s chambers. If you notice uneven inflation or deflation in different sections of your tent, it could be due to improper valve closure or blockage.

Start by checking if all valves are tightly closed and properly sealed. If this doesn’t resolve the issue, inspect each valve for any debris or obstructions that may hinder airflow.
Clearing these obstructions with gentle blowing or using compressed air can restore normal inflation patterns within your tent. By addressing common problems such as air leakage and maintaining proper inflation pressure through troubleshooting techniques like identifying leaks and clearing valve blockages, you will ensure a smooth setup process for your inflatable tent while enjoying stress-free camping adventures under sturdy shelter.
In Summary
Setting up an inflatable tent for camping can be a rewarding and convenient experience. By following the detailed steps provided in this article, you can ensure a hassle-free camping adventure.
Remember to carefully select a suitable campsite, prepare the ground properly, and lay out all the components before inflating the tent. Furthermore, troubleshooting common issues is an important aspect of any setup process.
By being aware of potential problems such as leaks or improperly secured parts, you can address these challenges proactively and minimize any disruptions to your camping experience. Additionally, always refer to the manufacturer’s instructions for specific guidance on your inflatable tent model.
Ultimately, investing in an inflatable tent offers numerous benefits such as easy setup and portability. It allows you to spend more time enjoying nature rather than struggling with complex setups.
With practice and familiarity with your specific tent model, the setup process will become quicker and more efficient over time. Remember that every camping trip is an opportunity for adventure and relaxation.
Embrace the beauty of nature surrounding you while reveling in the comfort of your inflatable tent. So go forth with confidence, set up your inflatable tent like a pro camper, and create lasting memories in the great outdoors!


